Start Here
Flash It in One Command
sudo ~/chip-mainline/scripts/flash-release.sh --fetch ~/chip-releaseThat is the whole flash. The five steps below get you to the point of running it — about 25 minutes, nearly all of it waiting.
This is for the original NextThing C.H.I.P.: Allwinner R8, single-core Cortex-A8, 512 MB RAM and 8 GB of onboard Hynix NAND. It writes mainline Linux 7.1.5 and Debian 13 to that NAND, so the board boots standalone with nothing plugged in but power.
Afterwards you have SSH and a serial console over the USB cable, WiFi, Bluetooth pairing, MMC and hardware video decode — the full list is below, along with what does not work: Bluetooth LE scanning, audio out of the box, and a real-time clock. For a PocketC.H.I.P., a desktop image or DIP display support, the x-chip images cover ground this project does not.
You cannot permanently break the board doing this. With the jumper fitted in step 3 the processor ignores its flash entirely and takes code over USB, so any failed or interrupted write can simply be redone.
Check before you start
A Debian or Ubuntu machine, a micro-USB cable, about 1 GB free disk — and one jumper wire between the board's FEL and GND pins.
Look at your board now: if it has bare, unpopulated header holes rather than fitted pins, that wire has to be soldered at both ends. There is no solderless way to do it. Everything else here is undoable; this is not.
1. Install the host tools
sudo apt install sunxi-tools u-boot-tools \
     netcat-openbsd xz-utils usbutils
That is Debian and Ubuntu; on another distribution install the same five packages however yours does it. Everything from here on needs sudo.
2. Get the repository
From your home directory:
cd ~
git clone https://gitlab.fixundfuchs.de/arnefuchs/chip-mainline.git
That is all you need to fetch by hand — the flasher downloads the release itself in step 4 and checks every file against SHA256SUMS. Have about 1 GB free: the image is decompressed in place before flashing.
3. Fit the FEL jumper
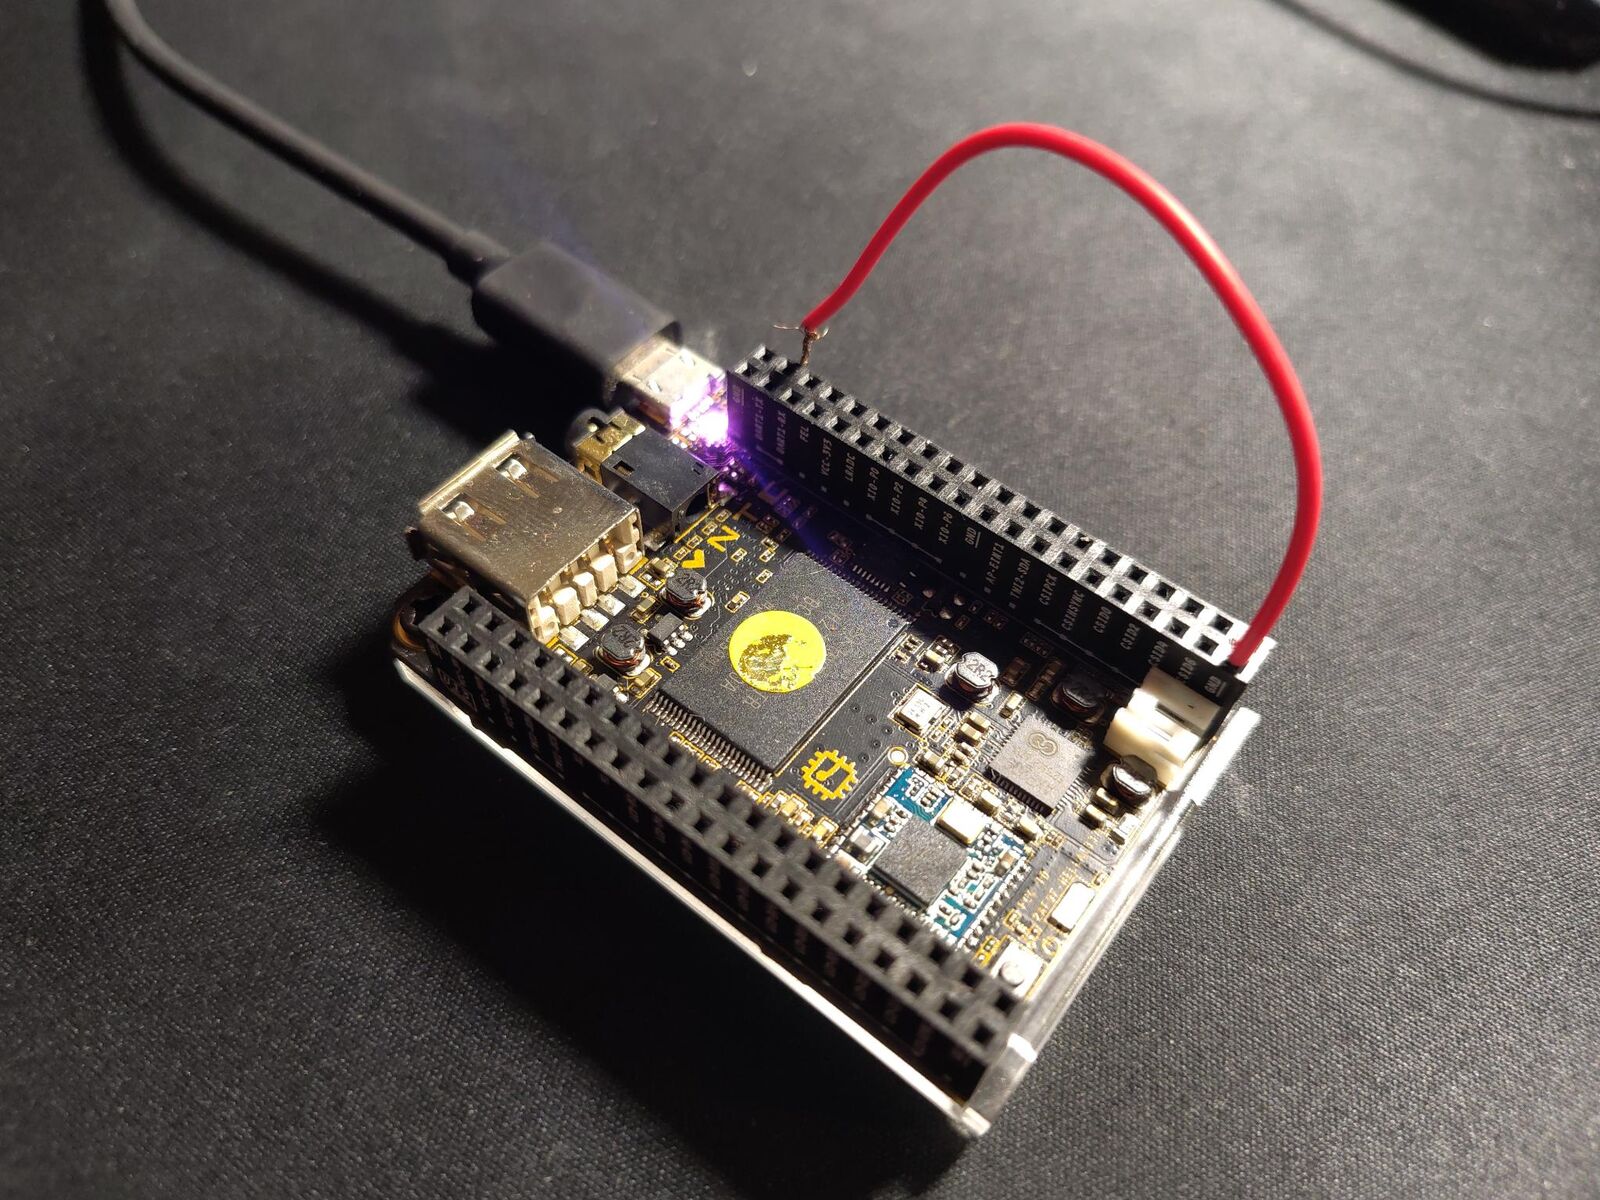
You need one jumper wire — a short piece of wire, or a female-to-female Dupont jumper, a few cents in any electronics shop. It connects the pin labelled FEL to any pin labelled GND. Both are silkscreened on U14, the long header along the top edge of the board, and they sit within a few pins of each other near the micro-USB end.
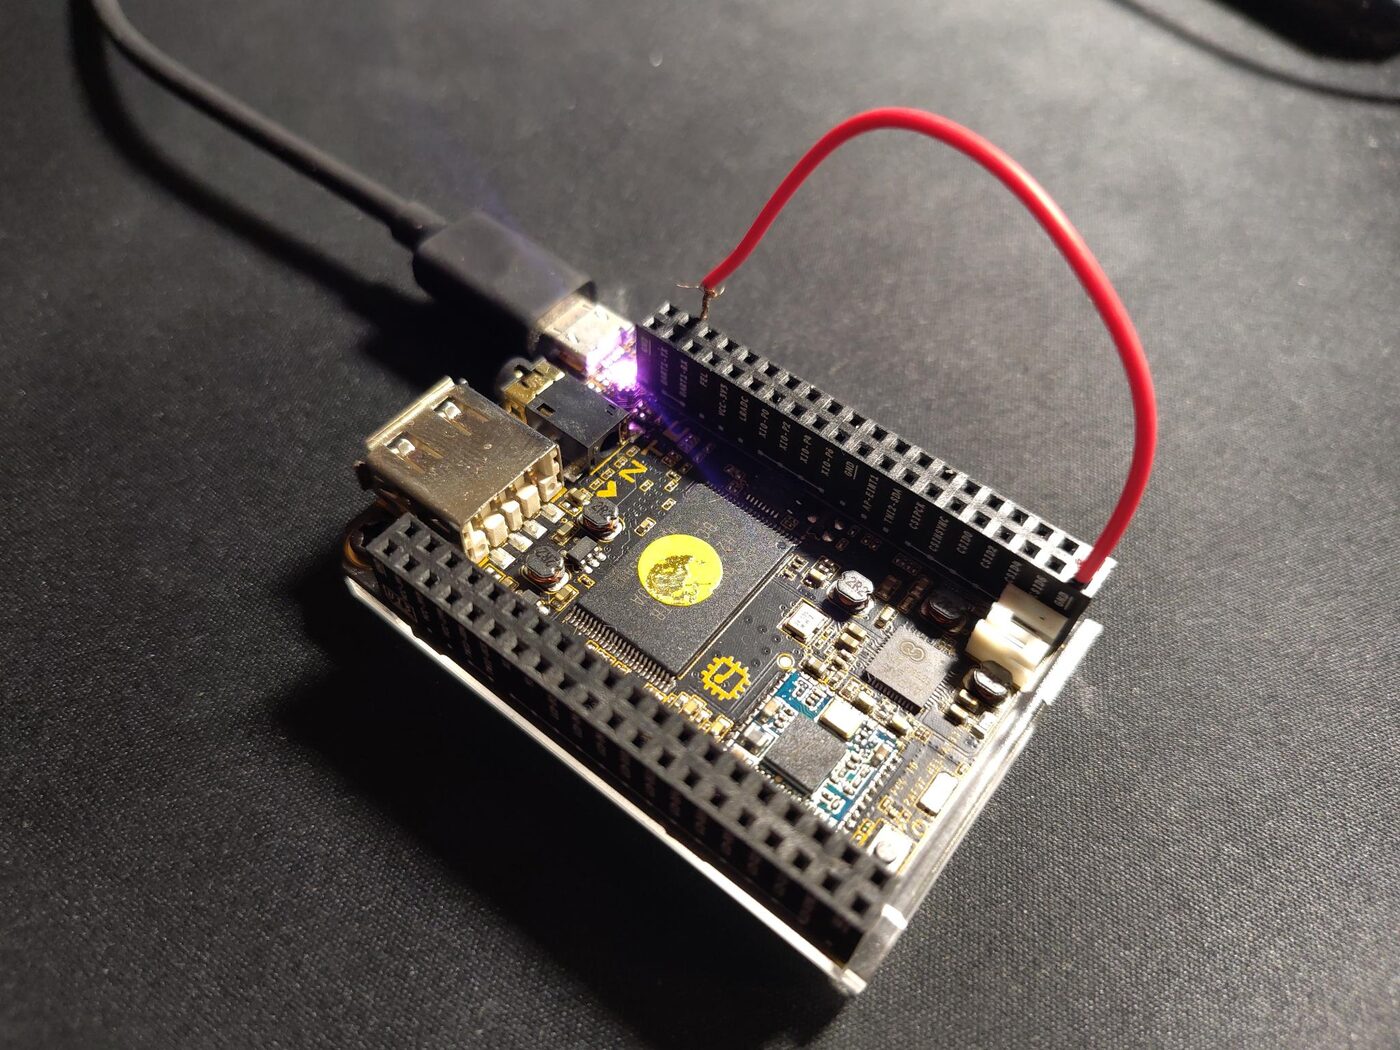
Fit the wire first, then plug in the micro-USB cable. The board only enters FEL mode when it powers up with the jumper already in place — fitting it to a running board does nothing. Leave it fitted for the whole procedure; you remove it at the end, in step 5.
4. Run it
sudo ~/chip-mainline/scripts/flash-release.sh --fetch ~/chip-release--fetch downloads the newest release into that directory first; --fetch=v1.1 pins a specific one. If you already have the files, drop the flag and it uses what is there.
The script verifies every file against SHA256SUMS, boots a small flashing system into the board's RAM, writes the root filesystem, mounts it to confirm it actually works, and only then writes the boot chain. It prints what it is doing at every stage, including how long each will take, so you can tell waiting from hanging.
It stops at the first failure. In particular it will not write a boot chain on top of a root filesystem that did not write cleanly, because that combination produces a board which looks dead and tells you nothing about why. If it does fail, nothing is left half-configured: unplug, replug with the jumper still fitted, and run the same command again.
Only two regions of flash are ever touched: the root filesystem, and the small area holding the bootloader. There is no whole-chip erase anywhere in it.
5. Log in
Remove the jumper and replug when the script tells you to. It then waits for the board itself — through the kernel coming up and userspace finishing — and prints the login line only once the board actually answers. You should not have to time anything.
ssh root@192.168.7.2The board is at 192.168.7.2 over the USB gadget link, with a serial console on ttyGS0 as a fallback.
If you check by hand, mind the gap. The USB gadget appears during kernel init, seconds after power-on, but the board's address is set much later by a systemd unit in userspace. A ping in between returns Destination Host Unreachable, which looks exactly like a failed flash and is not one. Wait for a reply rather than concluding from the first one:
until ping -c1 -W1 192.168.7.2 >/dev/null 2>&1; do sleep 2; done; echo upThe password is chip, and it is expired on purpose — it is published on this page, so it is worth nothing as a secret, and a board that later joins your WiFi should not still be using it. You will be asked three times:
| prompt | what to type |
|---|---|
root@192.168.7.2's password: | chip |
Current password: | chip again |
New password: | your new password, then the same again to confirm |
Between the first and second prompt the board prints "You are required to change your password immediately." That is expected. If the new password is too short or too simple it is rejected and the connection closes — also normal; ssh in again and pick a longer one.
Then WiFi:
nmcli device wifi list
nmcli device wifi connect "SSID" password "PASSWORD"
The board has no clock battery, so its time starts from whenever the image was built. apt will refuse to work until WiFi is up and the clock has synced — that is expected, not a fault.
If a board that used to boot stops booting
Run this first. It writes nothing at all, and tells you which stage is actually broken:
sudo ~/chip-mainline/scripts/flash-release.sh --diagnose ~/chip-releaseUsually only the bootloader needs rewriting, and the whole Debian install — packages, WiFi config and all — survives untouched.
Curious what any of this is doing, or want to change something? That is further down.
Why this path exists
Running a downloaded script under sudo is a reasonable thing to refuse. This path never asks you to. A preparation script does everything that needs no privilege — download, verify, check the bootloader images, build the U-Boot scripts — and then writes out the handful of commands that do, for you to read before running any of them.
Same procedure, same files. The hardware side is identical: micro-USB cable, a jumper between FEL and GND, about 1 GB free. The jumper photo is in the other tab.
1. Install the host tools
sudo apt install sunxi-tools u-boot-tools \
     netcat-openbsd xz-utils usbutils
2. Prepare, as your normal user
cd ~
git clone https://gitlab.fixundfuchs.de/arnefuchs/chip-mainline.git
~/chip-mainline/scripts/chip-prepare.sh --fetch ~/chip-release
No sudo, no password. It downloads the release, verifies every file against SHA256SUMS, confirms u-boot-dtb.img carries the legacy mkimage header and the corrected bootcmd, and builds the two U-Boot scripts the board will execute — leaving their plain-text sources as boot-rootfs.cmds and boot-chain.cmds, so you can read exactly what the board is told to do.
3. Read what it wants to run
less ~/chip-release/flash-commands.shEvery privileged step, commented, in order. Only two kinds of command in there actually need root: sunxi-fel, for raw USB access to the board, and ip, to put an address on the USB ethernet interface. Nothing else does — not the download, not the checksums, not even the netcat that serves the image, since port 5555 is unprivileged.
4. Fit the jumper and run them
With the board in FEL mode, either paste the commands one at a time, or:
cd ~/chip-release && sudo bash flash-commands.shIt pauses once, partway through, to have you replug the board with the jumper still fitted before the bootloader is written.
5. Or drop sudo entirely
sunxi-fel only needs root because raw USB access does. A udev rule hands that one device to a group instead:
sudo cp ~/chip-mainline/config/99-chip-fel.rules /etc/udev/rules.d/
sudo udevadm control --reload-rules
sudo usermod -aG plugdev "$USER"   # then log out and back in
After that only the two ip lines need privilege, and those are short enough to run by hand. The rule matches USB ID 1f3a:efe8 — the Allwinner FEL device — and nothing else.
6. Log in
Remove the jumper and replug. Give it about a minute, then:
until ping -c1 -W1 192.168.7.2 >/dev/null 2>&1; do sleep 2; done
ssh root@192.168.7.2
Password chip, expired on first use.
Three Bugs
What Stood in the Way
Full write-up, including the theories that turned out to be wrong, is in the repository's root-cause analysis.
The clockevent core is told a lie
timer-sun4i.c (and timer-sun5i.c) write a forced-minimum-delta interval of zero and report success instead of -ETIME. The scheduler tick dies permanently while interrupts keep running — the board still answers pings, but no task is ever scheduled again.
Every NAND read looked corrupt
Mainline's NAND ID table gives this chip 40-bit ECC — correct as the datasheet minimum, but the factory image and U-Boot wrote the flash at 56-bit. Reading 56-bit data with a 40-bit layout misaligns every ECC byte, so every read fails -EBADMSG and UBI can't attach.
A byte-perfect bootloader, silently rejected
The SPL expects a legacy mkimage header, not a raw ARM binary. Flashing u-boot-dtb.bin writes a byte-perfect U-Boot that the SPL then silently ignores — the readback matches the file exactly, and the board still never boots. The fix: flash u-boot-dtb.img instead.
Status
What Works, What Doesn't
The feature list below was verified on real hardware — see the download section for what that does and does not say about the published binary.
Verified working
Known gaps
- Bluetooth LE scanning fails —
hcitool lescanreturns an I/O error. Looks like a limitation of the staging r8723bs/btrtl path, not a config issue. Classic Bluetooth is unaffected — test this yourself before planning a BLE project around this board. - No audio server in the image. Bluetooth pairs and does service discovery, but A2DP needs PipeWire or PulseAudio plus libspa-0.2-bluetooth to actually stream — without it the speaker pairs, then drops the link.
- No RTC battery. The clock starts from the newest filesystem timestamp, so
aptfails until NTP syncs over WiFi.
Downloads
Get the Image
You do not need to download these by hand — flash-release.sh --fetch pulls the whole release and verifies it. The links are here for anyone who wants to inspect or mirror it.
What is in a release
If you do fetch them yourself, put all of it in one folder — nothing needs sorting or renaming, and flash-release.sh stops with the name of any file that is missing rather than failing partway through.
What each file does
| role | files |
|---|---|
| Ends up on the board | rootfs.ubifs.xz (Debian 13), zImage, sun5i-r8-chip.dtb, sunxi-spl-with-ecc.bin (the SPL, ECC-padded for the raw NAND write), u-boot-dtb.img |
| Runs from the board's RAM during flashing, never written to flash | chip-flash-initrd.img, u-boot-flashonly-spl.bin, u-boot-flashonly.bin, and u-boot-production-ram.bin — that last one only for --diagnose |
| Verification | SHA256SUMS — covers every file, in both compressed and raw form |
| Alternative form this procedure does not use | rootfs.ubi.xz — the same filesystem in ubinize form, for writing with ubiformat -f through some other tool. Download it with the rest; flash-release.sh simply ignores it. |
The bootloader binaries matter more than they look: without them a download cannot be written to a board at all, because the C.H.I.P.'s SPL will only accept a U-Boot carrying a legacy mkimage header. Release v1.0 shipped without them, which made "ready to flash" untrue in practice. They are built in CI from the published patch series against upstream U-Boot v2022.01, so the whole chain is reproducible.
v1.1 has been flashed onto a board and booted from. Not a build from the same sources — these exact published files: the bootloader written to NAND, the kernel and devicetree it starts, and the root filesystem it mounts. The board reached a login over the USB gadget link and reported 7.1.5+deb14-armmp. Verify downloads against SHA256SUMS all the same.
Released under GPL-2.0; some flashing logic follows NextThing Co's MIT-licensed CHIP-tools. Full attribution in NOTICE.
Optional
Building It Yourself
Optional. Everything below is for changing something, not for getting a working board — for that, see Flash It In One Command. The full step-by-step lives in docs/BUILD-AND-FLASH.md, which is kept current; this is the part worth reading even if you never build anything.
The four fixes that make this work
If you rebuild from scratch, do not lose these.
-
Kernel —
drivers/clocksource/timer-sun4i.c
at the top ofif (evt <= TIMER_SYNC_TICKS) return -ETIME;sun4i_clkevt_next_event()(and the same intimer-sun5i.c). Without it the driver programs the clockevent with interval 0 and returns success on the core's forced min-delta path, the scheduler tick dies, and all userspace freezes a few tens of seconds into boot while interrupts keep running. Do not also raise the registeredmin_delta— that makes the guard unreachable and reintroduces the bug. -
Devicetree —
arch/arm/boot/dts/allwinner/sun5i-r8-chip.dts
Both ECC properties are required (&nfc { status = "okay"; nand@0 { nand-ecc-mode = "hw"; nand-ecc-step-size = <1024>; nand-ecc-strength = <56>; }; };sunxi_nand_attach_chip()tests!ecc->size, so strength alone is silently ignored). Mainline's ID table says 40 for this chip; U-Boot and the factory image wrote the flash with 56, so 40 makes every read fail. Sanity check: a correct boot finds six bad blocks (2025/2027/2033/2035/2041/2043). ECC 40 finds only three.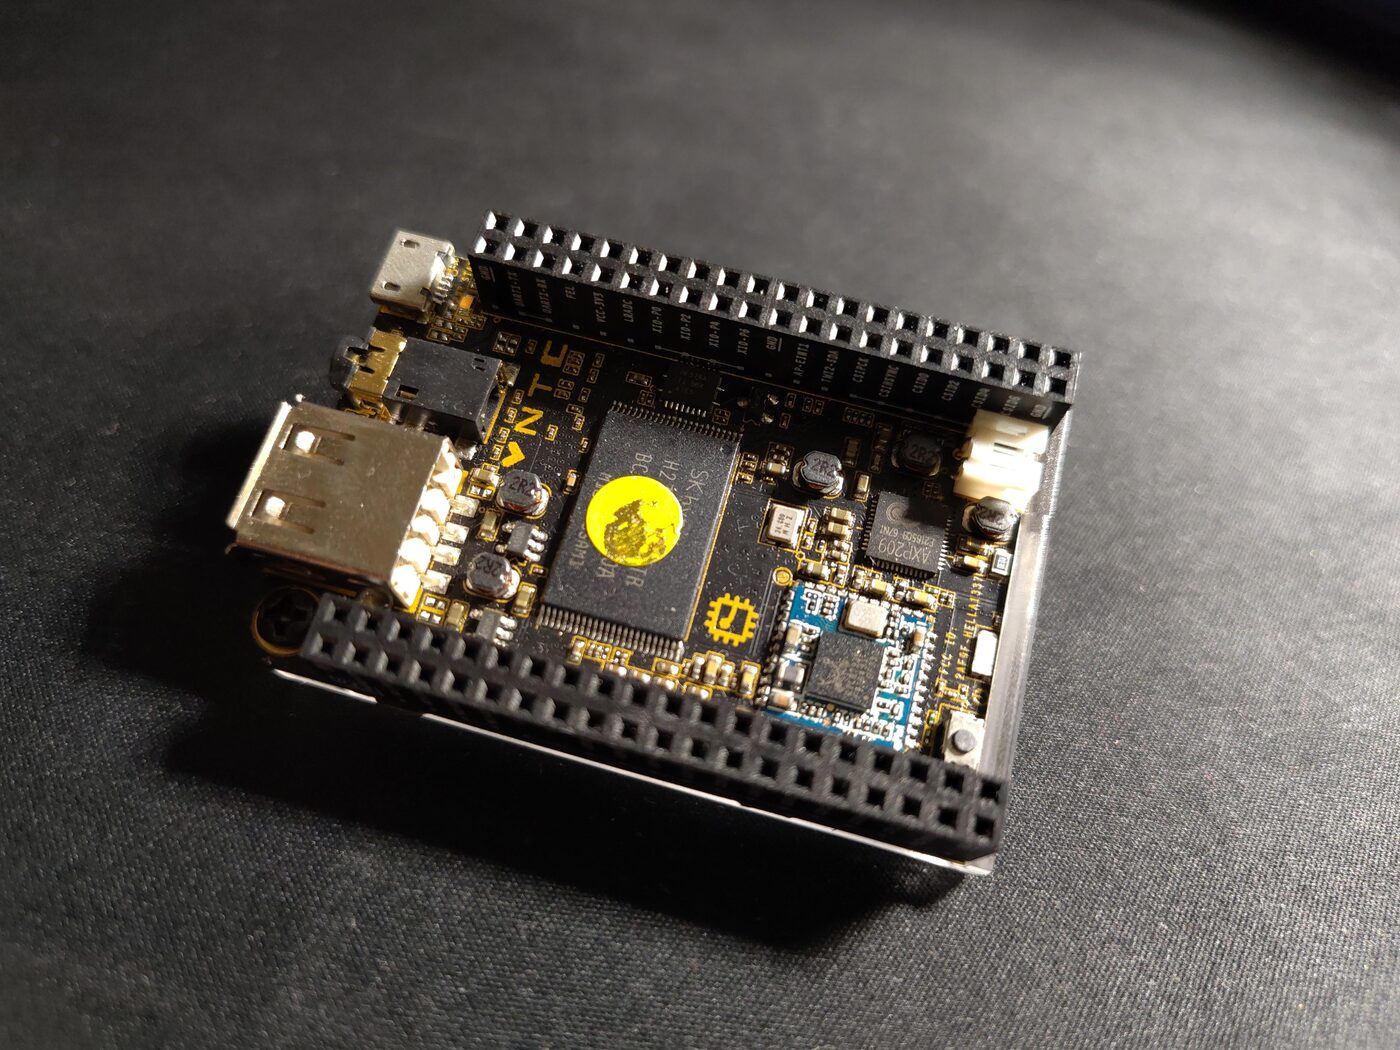
The chip in question: the SK hynix MLC NAND, center. The blue module to its right is the RTL8723BS WiFi/Bluetooth. -
Flashing — write
u-boot-dtb.img, NOTu-boot-dtb.bin
The SPL is built withCONFIG_SPL_LEGACY_IMAGE_SUPPORT=yandCONFIG_SPL_RAW_IMAGE_SUPPORTunset, so it requires the legacy mkimage header (0x27051956). A raw.binis silently rejected and the board never boots even though U-Boot is byte-perfect in flash. The flashing script now refuses to write a file that lacks the header, and CI refuses to publish one. -
Devicetree —
dr_mode = "peripheral"onusb_otg
Mainline says&usb_otg { dr_mode = "peripheral"; status = "okay"; };"otg". With that, the musb controller waits on role negotiation, the CDC gadget is never bound, and the board has nottyGS0console and nousb0ethernet — over the same micro-USB port it is powered from. It boots perfectly and cannot be reached by any means at all.This one was learned by shipping it. A release went out whose devicetree carried mainline's
"otg", because the patch series had never captured the change the development tree had always used. The image booted and was unreachable; the flashing procedure could not see the board either, since it drives it over that same gadget. The release was withdrawn and re-cut. CI now checks the property withfdtgetagainst the built devicetree, not just the source — the source being right is not evidence that the artifact is.
Also: the U-Boot config must NOT set CONFIG_AXP_DISABLE_POWERON_VIN, or the board will not power up from bare USB and needs a physical button press every time.
What FEL actually is
FEL is a USB bootloader baked into the processor's ROM. With the jumper fitted, the board ignores NAND entirely and waits for a host to hand it code — which is what makes every step of the flashing procedure recoverable, and a permanently bricked board almost impossible.
It also means the opposite of what people assume: reaching FEL proves very little. It works even when everything in NAND is unreadable. It tells you the SoC and the USB link are alive, and nothing more. That is why diagnosing a board that stopped booting starts with --diagnose, which runs U-Boot from RAM and lets it try the board's own NAND contents without writing anything — rather than with a reflash.
What can be verified, and what cannot
U-Boot is written through the normal ECC path, so md5sum /dev/mtd2 reads back byte-identical to the file. The SPL is not: it is written raw with its own ECC padding, so reading it back — with dd, md5sum or nanddump --oob — runs the data through an ECC layout it was never written in and returns garbage. That garbage differs between the two SPL copies, because it depends on the physical block.
A correct SPL and a corrupt one are indistinguishable this way. During the recovery described in the log, two "mismatching" SPL copies looked like conclusive evidence of corruption and were worth exactly nothing — a freshly written, known-good SPL read back the same way. The only test of the SPL is whether the board boots.
Toolchain
The published binaries are built with:
arm-linux-gnueabihf-gcc (Debian 15.3.0-2) 15.3.0
GNU ld (GNU Binutils for Debian) 2.47
gcc-15-arm-linux-gnueabihf is in Debian sid; trixie ships 14.2. Other versions build fine — this is recorded so the CI release job and the download come out of the same compiler, not because 15 is required. Note that U-Boot embeds a build timestamp, so rebuilding it will not reproduce the published hash even with an identical compiler; verify downloads against SHA256SUMS rather than against your own build.
Known cosmetic issues
WARNING: drivers/usb/gadget/function/u_serial.c:703 at gs_closeeach time agetty closes the gadget tty (60 s login timeout). Harmless, noisy on the console. Worth reporting upstream separately.- Kernel messages interleave with the getty on ttyGS0, so console logins are awkward. Use SSH.